If you’re running a CNC turning operation, whether you’re a small job shop cranking out custom parts or a mid-sized manufacturer keeping production lines moving, tool life management isn’t just a “nice-to-have” — it’s the glue that keeps your machine running smoothly, your parts consistent, and your costs from spiraling. As a CNC turning center supplier, I’ve talked to so many operators who treat tools like disposable afterthoughts: swap ’em when they break, wing it on cutting speeds, and hope for the best. Spoiler: that’s a quick way to deal with unexpected downtime, scrapped parts, and blown budgets. Let’s break this down like I talk to my regular clients — no stuffy jargon, just what actually works for turning centers. CNC Turning Center
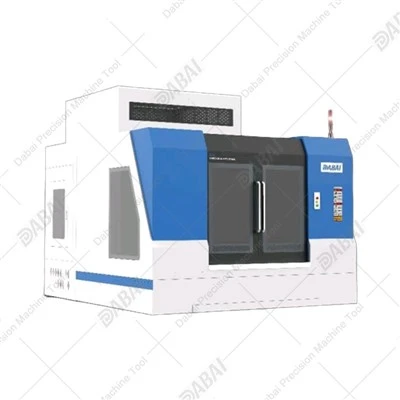
First, let’s get clear on what tool life even means here. For a CNC turning center, it’s not just how long a drill or insert cuts before it physically snaps. It’s the total time a tool performs to spec: smooth finishes, tight tolerances, no built-up edge (that gunk that sticks to the cutting tip), and consistent chip control. A lot of folks miss that last part — if your chips are messy, wrapping around the workpiece, that’s a sign your tool’s already past its prime, even if it looks fine. Messy chips cause tool wear fast, and they can scratch the part you’re making, leading to scrap. That’s the kind of thing that kills your delivery times, especially when you’re on a tight schedule.
Now, why does this matter specifically for turning centers, not milling or other machines? Turning centers work by rotating the workpiece and feeding a tool into it — so the cutting edge is under constant, dynamic pressure. The rotation adds centrifugal force, which makes wear happen faster, but it also means you can track wear with real data in a way that’s a little different from, say, a mill. On a turning center, tool life correlates directly to spindle hours, material being cut (aluminum vs. hardened steel? Total different ballgames), and your feed/speed parameters. Mess with those, and you cut tool life in half or double it — no in-between.
Let’s talk about the mistakes I see all the time. The biggest one: “set it and forget it” tooling. I’ve had a job shop owner tell me he runs the same insert for 8 hours straight cutting 1018 steel, no checks. By hour 7, that insert’s got a crater in the cutting edge from heat, so the last 20 parts are off-tolerance, and he has to scrap the entire batch. That’s a $1,200 loss for a 2-hour delay — all because he didn’t monitor tool life properly. Another mistake: using the wrong tool for the material. You wouldn’t use a general-purpose carbide insert for cutting Inconel, right? But so many guys grab whatever’s on the shelf and hope it works. That’s like using a butter knife to cut a bolt — it’ll break, and it’ll make a mess.
So what actually is good tool life management for a CNC turning center? It’s not just buying expensive tooling — it’s a system. Let’s split it into simple, actionable steps that any shop can implement, no fancy software required.
First, baseline your tools. Before you start a production run, test a new tool under your exact conditions: same material, same feed rate, same spindle speed. Run it for a few cuts, check the part finish and tolerance, note the time it takes until you see the first signs of wear (like a faint crater or minor chip on the edge). That’s your baseline. I always tell new clients to write this down — not in a spreadsheet that gets lost, but on a whiteboard near the machine or a quick note in their phone. For example, cutting 6061 aluminum with a 0.5” solid carbide turning insert at 1,500 RPM, feed 0.015” per revolution: baseline tool life is 45 minutes before you need to swap. Adjust if you see wear faster — no shame in dialing it in step by step.
Next, track tool usage accurately. Here’s where a lot of shops cut corners. Don’t just guess how long a tool has been running — your CNC turning center’s controller actually tracks spindle hours, right? Most modern controllers (Fanuc, Haas, Okuma, the big ones) have a tool life counter built in. Use it. If you’re running a Haas ST-20, for example, you can program the controller to alert you when a tool hits 40 minutes of spindle time (your baseline) so the operator can check it mid-run. For smaller shops with older machines that don’t have that built-in tool, keep a log book by each turning center: every time you load a new insert, write the time, and every time you swap it, jot down how long it ran. It takes 10 seconds per tool, and it’ll save you hours of headache later.
Then, monitor wear in real-time. You don’t have to stop every 10 minutes — just a quick check every 5 or 6 parts. Look for three key things: 1) Flank wear: the flat area on the side of the insert where it rubs against the workpiece. If it’s more than 0.003” wide, that’s time to swap. 2) Crater wear: the indentation on the rake face of the insert, where chips rub. If it’s deep enough that it’s starting to change how the chip forms, swap. 3) Built-up edge (BUE): little chunks of workpiece material stuck to the cutting tip. BUE messes up the part finish, so even if the wear is small, if you see BUE, it’s time for a tool change. On my last job with a client, we added a 10-second visual check after every part, and they cut scrap from 8% to 1% — that’s a massive win, and it’s so simple.
Another big part of tool life management: tool selection. This is where a good supplier (that’s us, by the way) can actually help, not just sell you tools. For turning centers, you have different insert grades for different materials. Let’s break it down quick: for soft materials like aluminum or brass, use a uncoated or diamond-coated carbide insert — it runs fast, no heat buildup. For mild steel (1018, A36), a TiN or TiCN coated insert is perfect — it resists wear, lasts longer. For hardened steel (HRC 45+), you need a cermet or ceramic insert — regular carbide won’t hold up to that heat. I’ve had clients who used the wrong insert for hardened steel wonder why tools were breaking every 10 minutes; once we swapped to the right grade, tool life doubled. Also, don’t skip on tool holders. A worn or loose holder will wear out a good insert in no time. If your holder has a chip in the taper, that’s a problem — replace it, don’t keep using it hoping it’ll work.
Then, there’s optimization. Once you have your baseline, you can tweak feeds and speeds to get the most out of your tools without sacrificing part quality. For example, if your baseline tool life is 45 minutes, but you’re finishing parts way faster than you need, you can bump the spindle speed by 100 RPM. As long as the part finish stays within spec, that’s more parts per tool, fewer tool changes, less downtime. I worked with a small job shop that was running at 1,200 RPM for aluminum; we cranked it to 1,500 RPM, adjusted feed just a little, and their tool life went from 45 to 60 minutes. They made 33% more parts per insert — that’s pure profit right there. Just be careful not to overdo it: too high a speed causes too much heat, which will break the insert down fast.
What about unexpected tool failures? Even with the best management, tools break sometimes. The key here is to minimize the fallout. First, have extra tools ready on the machine’s tool turret — no running to the tool crib 10 minutes when a tool snaps. Second, use tool breakage detection if your machine has it. Most modern CNC turning centers can sense when a tool stops cutting because of a load spike, and it’ll stop the machine automatically so it doesn’t ruin the part. If you don’t have that, a quick check before running a new tool (like tapping the insert lightly with a tool to make sure it’s seated) can save you from a big mess.
Wait, let’s talk about cost, because that’s what everyone cares about. Good tool life management doesn’t mean spending more on tools — it means spending less per part. If a $10 insert lasts 45 minutes, that’s $0.22 per minute of cutting time. If you extend that to 60 minutes, that’s $0.16 per minute. Same goes for tool changes: every time you swap a tool, that’s 2 minutes of downtime (for changing, indexing, checking), multiplied by how many times you do that a shift. Cut tool changes by 20% and you get more production time. I’ve seen shops that switched from reactive tool changes (changing when they break) to proactive (changing at the end of their baseline life) save up to 25% on tooling costs alone. Add in less scrap, and that number goes even higher.
Now, let’s get real for small shops. I know not everyone has a $10,000 tool management software or a team of quality control guys. You can do this with basic stuff. Grab a spiral notebook (or even Notes on your phone), mark each machine’s tools, test a baseline, check every few parts, and swap when you see wear. It’s not fancy, but it works. For larger shops, it’s a little more detailed — maybe integrate tool tracking into your ERP system, use offline presetting tools so you can change tools off the machine instead of stopping production, that kind of thing. But even the small steps make a difference.
Let’s address a common pushback: “I don’t have time to monitor tools, I’m already busy running parts.” I get it. But think about it: if you have one scrap part every 10, that’s 10% of your time spent re-making that part, plus the time to check why it’s scrap. If you’re dealing with a broken tool that causes a 30-minute downtime, that’s a whole part run gone. Spending 10 seconds per tool, 3 times a shift, is way less time than fixing those problems. It’s a tradeoff, but it pays off big.
As a CNC turning center supplier, I’ve seen clients implement good tool life management and turn their operations around. A job shop that used to have 20% downtime from tool issues now runs 95% uptime. A manufacturer that was scrapping 12% of aerospace parts now has less than 1% scrap. None of that was from buying a fancy new machine — it was from getting their tooling and tool life management right.
So, what’s the takeaway here? Tool life management for a CNC turning center is proactive, not reactive. It’s setting a baseline, tracking usage, monitoring wear, choosing the right tools, and optimizing your process for both performance and cost. It’s not rocket science, but it’s the difference between a shop that’s treading water and one that’s growing.

If you’re running a CNC turning center and you’re dealing with tool-related downtime, scrap, or high tooling costs, let’s chat. We’ve worked with shops of all sizes to set up simple, effective tool life management systems that fit their operations, no matter their budget. We can help you pick the right inserts, adjust your feeds and speeds, even train your operators on quick checks that make a big difference. Drop us a line to talk through what’s going on in your shop — no sales pitch, just real advice from people who work with turning centers every day.
Gantry Machining Center References
- ASM International. (2004). Tool Life and Wear in Cutting Processes. Handbook of Materials Processing: Machining.
- DeVries, W. R. (2018). Metal Cutting Principles. Oxford University Press.
- Modern Machine Shop. (2022). “Tool Life Management for Turning: Best Practices for Job Shops”.
- Sandvik Coromant. (2021). Turning Tool Selection and Tool Life Optimization Guide.
- Haas Automation. (2020). CNC Turning Center Tool Management Best Practices for Machine Operators.
Dabai Precision Machine Tool (Jiangsu) Co., Ltd.
As one of the most professional CNC turning center manufacturers and suppliers in China, we’re featured by quality products and good price. Please rest assured to buy advanced CNC turning center for sale here from our factory. We also accept customized orders.
Address: No. 66-1, Zhenhu North Road, Hudai Town, Binhu District, Wuxi City
E-mail: elaine@dabaicnc.com
WebSite: https://www.cnc-dabai.com/
